抓取数据,需要通过网站的授权
一、注册获取sina授权权限
该链接授权后返回一个code,然后获取信息
二、创建权限的控制器、模型、view模块
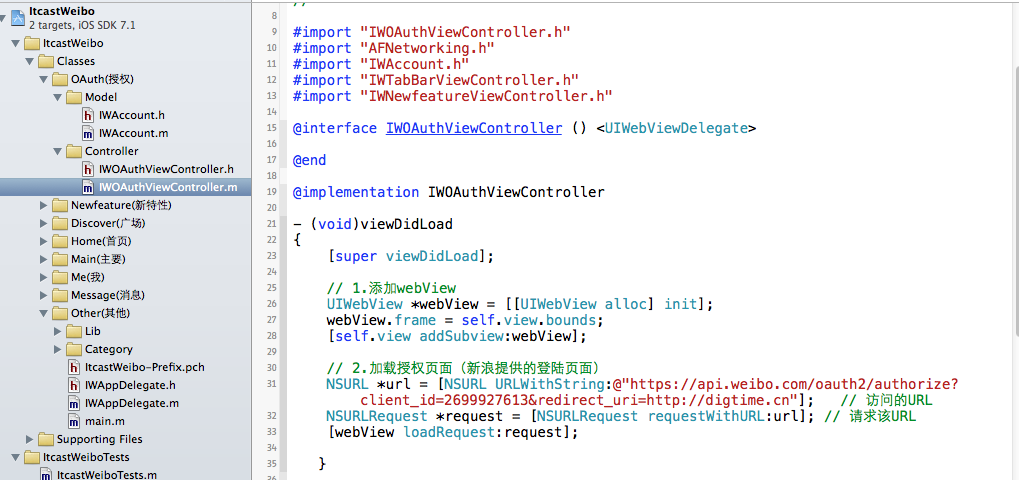
#import "IWOAuthViewController.h"#import "AFNetworking.h"#import "IWAccount.h"#import "IWTabBarViewController.h"#import "IWNewfeatureViewController.h"@interface IWOAuthViewController ()@end@implementation IWOAuthViewController- (void)viewDidLoad{ [super viewDidLoad]; // 1.添加webView UIWebView *webView = [[UIWebView alloc] init]; webView.frame = self.view.bounds; [self.view addSubview:webView]; // 2.加载授权页面(新浪提供的登陆页面) NSURL *url = [NSURL URLWithString:@"https://api.weibo.com/oauth2/authorize?client_id=2699927613&redirect_uri=http://digtime.cn"]; // 访问的URL NSURLRequest *request = [NSURLRequest requestWithURL:url]; // 请求该URL [webView loadRequest:request]; }
三、拦截webView的所有请求
通过新浪授权后,页面会直接跳转到重定向的地址,但是这里希望授权后,获取code码,拿到Token,然后获取到用户的数据,而不是直接跳转到重定向的地址,所以,这里需要监听webView的加载,所以,需要拦截webView的所有请求,解决方法,可以通过添加代理<UIWebViewDelegate>,然后拦截数据。

拦截webView自动请求的路径,然后截取code码,
通过code码获取accessToken。
#pragma mark - webView代理方法/** * 当webView发送一个请求之前都会先调用这个方法, 询问代理可不可以加载这个页面(请求) * * @param request * * @return YES : 可以加载页面, NO : 不可以加载页面 */-(BOOL)webView:(UIWebView *)webView shouldStartLoadWithRequest:(NSURLRequest *)request navigationType:(UIWebViewNavigationType)navigationType{ // 1.请求的URL路径 NSString *urlStr = request.URL.absoluteString; // 2.判断字符串里边含有'code='字符,目的是拦截该链接,不让其自动加载,并获取code码 // http://digtime.cn/?code=8b1c66a777fe49b26fd650a4f2dacd98 NSRange range = [urlStr rangeOfString:@"code="]; // 3.如果urlStr中包含了code= // if(range.location != NSNotFound) if(range.length) { // 4.获取code=后面的请求标记(经过用户授权成功的) int loc = range.location + range.length; NSString *code = [urlStr substringFromIndex:loc]; // 5.发送POST请求给新浪,通过code换取一个accessToken // 发送请求一般用别人封装好的请求框架 // ASI:HTTP终结者,已经被淘汰 // AFN(AFNetworking)\AFN [self accessTokenWithCode:code]; } NSLog(@"%@", request.URL); return YES; } 四、通过AFN(AFNetworking)框架发送POST请求,获取accessToken
具体步骤:
1.创建请求管理对象
2.封装请求参数(参数用字典封装)
3.发送请求,请求成功后服务器端响应一个对象responseObject
4.先将字典转为模型(创建model,IWAccount.h 取数据放数据非常方便)
5.存储模型数据---存储accessToken信息 ---归档
5.1获取沙盒路径
5.2 拼接文件路径
5.3 Account.h 需要遵守 NSCoding协议,哪些属性需要归档,哪些需要解档
5.4 然后需要在IWAppDelegate.m中当应用加载完后,需要判断用户以前是否有登陆成功过,沙盒里边有数据,然后判断沙盒数据授权信息是否有过期,如果没有过期则直接进入微博。
注意:IOS会将服务器返回的json解析成字典
通过code换取一个accessToken方法:
// IWOAuthViewController.m/** * 通过code换取一个accessToken redirect_uri true string 回调地址,需需与注册应用里的回调地址一致。 */-(void)accessTokenWithCode:(NSString *)code{ // 发送POST请求给新浪,通过code换取一个accessToken // 发送请求一般用别人封装好的请求框架,如ASI,AFN(项目中使用这个) // ASI:HTTP终结者,已经被淘汰 // AFN(AFNetworking)\AFN // 1.创建请求管理对象 AFHTTPRequestOperationManager *mgr = [AFHTTPRequestOperationManager manager]; // 说明服务器返回的为JSON mgr.responseSerializer = [AFJSONResponseSerializer serializer]; // 2.封装请求参数 NSMutableDictionary *params = [NSMutableDictionary dictionary]; params[@"client_id"] = @"2699927613"; params[@"client_secret"] = @"737ea9bf1343d************"; params[@"grant_type"] = @"authorization_code"; params[@"code"] = code; params[@"redirect_uri"] = @"http://digtime.cn"; // 3.发送请求,参数用字典封装,请求成功后服务器端响应一个对象responseObject [mgr POST:@"https://api.weibo.com/oauth2/access_token" parameters: params success:^(AFHTTPRequestOperation *operation, id responseObject) { // IWLog(@"请求成功:%@", [responseObject class]);从字典中取出数据 // 4.先将字典转为模型(创建model,IWAccount.h 取数据放数据非常方便) IWAccount *account = [IWAccount accountWithDict:responseObject]; // NSString *accessToken = responseObject[@"access_token"]; // 通过返回的数据,判断授权是否过期,如果过期,则重新授权,打开登陆页面 // 5.存储模型数据---存储accessToken信息 ---归档 // 5.1获取沙盒路径 NSString *doc = [NSSearchPathForDirectoriesInDomains(NSDocumentDirectory, NSUserDomainMask, YES) lastObject]; // 5.2 拼接文件路径 NSString *file = [doc stringByAppendingPathComponent:@"account.data"]; [NSKeyedArchiver archiveRootObject:account toFile:file]; // 5.3 Account.h 需要遵守 NSCoding协议,哪些属性需要归档,哪些需要解档 // 5.4 然后需要在IWAppDelegate.m代理中当应用加载完后,需要判断用户以前是否有登陆成功过,沙盒里边有数据,然后判断沙盒数据授权信息是否有过期,如果没有过期则直接进入微博 // 6.新特性去首页 } failure:^(AFHTTPRequestOperation *operation, NSError *error) { IWLog(@"请求失败:%@", error); }]; }
账户模型:
IWAccount.h
//// IWAccount.h// ItcastWeibo// 帐号模型#import// 需要遵守 NSCoding协议,哪些属性需要归档,哪些需要解档@interface IWAccount : NSObject @property (nonatomic, copy) NSString *access_token;// 如果服务器返回的数字很大, 建议用long long(比如主键, ID)@property (nonatomic, assign) long long expires_in;@property (nonatomic, assign) long long remind_in;@property (nonatomic, assign) long long uid;+ (instancetype)accountWithDict:(NSDictionary *)dict;- (instancetype)initWithDict:(NSDictionary *)dict;@end
IWAccount.m
//// IWAccount.m// ItcastWeibo//#import "IWAccount.h"@implementation IWAccount+ (instancetype)accountWithDict:(NSDictionary *)dict{ return [[self alloc] initWithDict:dict];}- (instancetype)initWithDict:(NSDictionary *)dict{ if(self = [super init]){ // KVC [self setValuesForKeysWithDictionary:dict]; } return self;}// 协议方法1-从文件中解析对象的时候调用-(id)initWithCoder:(NSCoder *)decoder{ if(self = [super init]){ self.access_token = [decoder decodeObjectForKey:@"access_token"]; self.remind_in = [decoder decodeInt64ForKey:@"remind_in"]; self.expires_in = [decoder decodeInt64ForKey:@"expires_in"]; self.uid = [decoder decodeInt64ForKey:@"uid"]; } return self;}// 协议方法2-将对象写入文件的时候调用-(void)encodeWithCoder:(NSCoder *)encoder{ [encoder encodeObject:self.access_token forKey:@"access_token"]; [encoder encodeInt64:self.remind_in forKey:@"remind_in"]; [encoder encodeInt64:self.expires_in forKey:@"expires_in"]; [encoder encodeInt64:self.uid forKey:@"uid"]; }@end 程序代理IWAppDelegate.m中判断有没有存储账号信息及版本号
//// IWAppDelegate.m// ItcastWeibo#import "IWAppDelegate.h"#import "IWTabBarViewController.h"#import "IWNewfeatureViewController.h"#import "IWOAuthViewController.h"#import "IWAccount.h"@implementation IWAppDelegate- (BOOL)application:(UIApplication *)application didFinishLaunchingWithOptions:(NSDictionary *)launchOptions{ self.window = [[UIWindow alloc] initWithFrame:[[UIScreen mainScreen] bounds]]; // 先判断有无存储账号信息 NSString *doc = [NSSearchPathForDirectoriesInDomains(NSDocumentDirectory, NSUserDomainMask, YES) lastObject]; NSString *file = [doc stringByAppendingPathComponent:@"account.data"]; IWAccount *account = [NSKeyedUnarchiver unarchiveObjectWithFile:file]; if (account) { // 之前登录成功 NSString *key = @"CFBundleVersion"; // 取出沙盒中存储的上次使用软件的版本号 NSUserDefaults *defaults = [NSUserDefaults standardUserDefaults]; NSString *lastVersion = [defaults stringForKey:key]; // 获得当前软件的版本号 NSString *currentVersion = [NSBundle mainBundle].infoDictionary[key]; if ([currentVersion isEqualToString:lastVersion]) { // 显示状态栏 application.statusBarHidden = NO; self.window.rootViewController = [[IWTabBarViewController alloc] init]; } else { // 新版本 self.window.rootViewController = [[IWNewfeatureViewController alloc] init]; // 存储新版本 [defaults setObject:currentVersion forKey:key]; [defaults synchronize]; } } else { // 之前没有登录成功 self.window.rootViewController = [[IWOAuthViewController alloc] init]; } [self.window makeKeyAndVisible]; return YES;} 完整的授权控制器IWOAuthViewController.m代码:
//// IWOAuthViewController.m// ItcastWeibo//#import "IWOAuthViewController.h"#import "AFNetworking.h"#import "IWAccount.h"#import "IWTabBarViewController.h"#import "IWNewfeatureViewController.h"@interface IWOAuthViewController ()@end@implementation IWOAuthViewController- (void)viewDidLoad{ [super viewDidLoad]; // 1.添加webView UIWebView *webView = [[UIWebView alloc] init]; webView.frame = self.view.bounds; webView.delegate = self; [self.view addSubview:webView]; // 2.加载授权页面(新浪提供的登陆页面) NSURL *url = [NSURL URLWithString:@"https://api.weibo.com/oauth2/authorize?client_id=2699927613&redirect_uri=http://digtime.cn"]; // 访问的URL NSURLRequest *request = [NSURLRequest requestWithURL:url]; // 请求该URL [webView loadRequest:request]; }#pragma mark - webView代理方法/** * 当webView发送一个请求之前都会先调用这个方法, 询问代理可不可以加载这个页面(请求) * * @param request * * @return YES : 可以加载页面, NO : 不可以加载页面 */-(BOOL)webView:(UIWebView *)webView shouldStartLoadWithRequest:(NSURLRequest *)request navigationType:(UIWebViewNavigationType)navigationType{ // 1.请求的URL路径 NSString *urlStr = request.URL.absoluteString; // 2.判断字符串里边含有'code='字符,目的是拦截该链接,不让其自动加载,并获取code码 // http://digtime.cn/?code=8b1c66a777fe49b26fd650a4f2dacd98 NSRange range = [urlStr rangeOfString:@"code="]; // 3.如果urlStr中包含了code= // if(range.location != NSNotFound) if(range.length) { // 4.获取code=后面的请求标记(经过用户授权成功的) int loc = range.location + range.length; NSString *code = [urlStr substringFromIndex:loc]; // 5.发送POST请求给新浪,通过code换取一个accessToken // 发送请求一般用别人封装好的请求框架 // ASI:HTTP终结者,已经被淘汰 // AFN(AFNetworking)\AFN [self accessTokenWithCode:code]; } NSLog(@"%@", request.URL); return YES; }/** * 通过code换取一个accessToken redirect_uri true string 回调地址,需需与注册应用里的回调地址一致。 */-(void)accessTokenWithCode:(NSString *)code{ // 发送POST请求给新浪,通过code换取一个accessToken // 发送请求一般用别人封装好的请求框架,如ASI,AFN(项目中使用这个) // ASI:HTTP终结者,已经被淘汰 // AFN(AFNetworking)\AFN // 1.创建请求管理对象 AFHTTPRequestOperationManager *mgr = [AFHTTPRequestOperationManager manager]; // 说明服务器返回的为JSON mgr.responseSerializer = [AFJSONResponseSerializer serializer]; // 2.封装请求参数 NSMutableDictionary *params = [NSMutableDictionary dictionary]; params[@"client_id"] = @"2699927613"; params[@"client_secret"] = @"737ea9bf1343****************"; params[@"grant_type"] = @"authorization_code"; params[@"code"] = code; params[@"redirect_uri"] = @"http://digtime.cn"; // 3.发送请求,参数用字典封装,请求成功后服务器端响应一个对象responseObject [mgr POST:@"https://api.weibo.com/oauth2/access_token" parameters: params success:^(AFHTTPRequestOperation *operation, id responseObject) { // IWLog(@"请求成功:%@", [responseObject class]);从字典中取出数据 // 4.先将字典转为模型(创建model,IWAccount.h 取数据放数据非常方便) IWAccount *account = [IWAccount accountWithDict:responseObject]; // NSString *accessToken = responseObject[@"access_token"]; // 通过返回的数据,判断授权是否过期,如果过期,则重新授权,打开登陆页面 // 5.存储模型数据---存储accessToken信息 ---归档 // 5.1获取沙盒路径 NSString *doc = [NSSearchPathForDirectoriesInDomains(NSDocumentDirectory, NSUserDomainMask, YES) lastObject]; // 5.2 拼接文件路径 NSString *file = [doc stringByAppendingPathComponent:@"account.data"]; [NSKeyedArchiver archiveRootObject:account toFile:file]; // 5.3 Account.h 需要遵守 NSCoding协议,哪些属性需要归档,哪些需要解档 // 5.4 然后需要在IWAppDelegate.m中当应用加载完后,需要判断用户以前是否有登陆成功过,沙盒里边有数据,然后判断沙盒数据授权信息是否有过期,如果没有过期则直接进入微博 // 6.新特性去首页 } failure:^(AFHTTPRequestOperation *operation, NSError *error) { IWLog(@"请求失败:%@", error); }]; }@end